Overview
The Pera Wallet allows you to sign transactions that are presented to you by mobile and desktop decentralized-applications (also known as dApps).
Imagine you’re trying to purchase an item from an online retailer that supports Algorand as a payment option. This integration allows you to use your Pera Wallet accounts to sign those transactions, all from your phone.
Algorand provides dApp developers the tools to easily integrate with the Pera Wallet. If a dApp supports this integration, the Pera Wallet can be used to review and sign transactions using your account. During this process, you can rest assured that your private keys never leave your phone.
If you are not familiar with the concept of dApps and would like to better understand it, please visit this video
Disclaimer
Please note that this feature is merely a convenience mechanism for you to sign transactions that are created from 3rd party applications. The connection between the Pera Wallet and the third-party dApps is managed by another external party called WalletConnect.
It is extremely important that you carefully review transactions before signing them as transactions are irreversible. If you ever feel like a dApp is presenting wrong or malicious transactions, decline any transaction requests and remove the connection from your Pera Wallet. If you have questions about the transactions, please contact the dApp with whom you’re interacting.
In case you sign a transaction from a dApp related to a SmartContract, you must carefully read the terms & conditions of the SmartContract. The Pera Wallet can’t take any responsibility if you have an issue with a third-party dApp from whom you have approved the transaction.
Signing Transactions from a Desktop dApp
Step by Step Guide
This section will walk you through how to sign transactions when you’re interacting with a dApp on a desktop browser. Keep in mind that the user interface (UI) will differ slightly on each dApp but the process will generally be the same.
- Begin by clicking a button in a dApp that says something like Connect Wallet or Add Payment Option.
- You’ll then be prompted to scan a QR with your Pera Wallet.
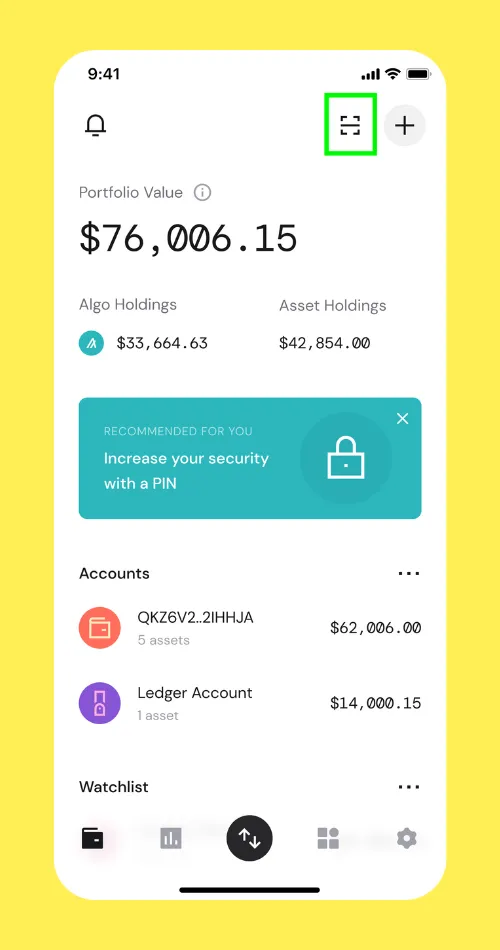
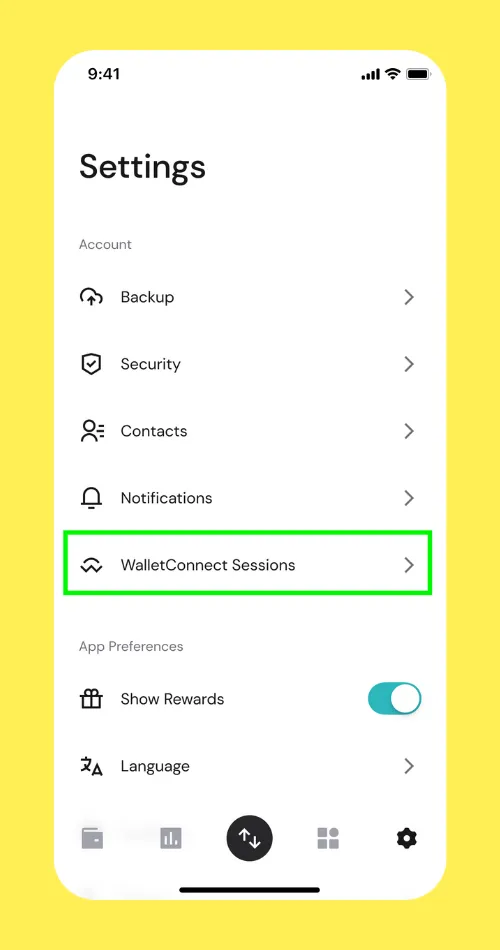
- Now, it’s time to take out your phone and scan the QR either from the home screen or from the WalletConnect Sessions page (shown in screenshots 3a. and 3b. respectively).
3a. Scan QR from Accounts View or 3b. Scan QR from Settings
3a)
3b)
You can also paste a WalletConnect URI or a Pera link to open it, instead of scanning a QR.
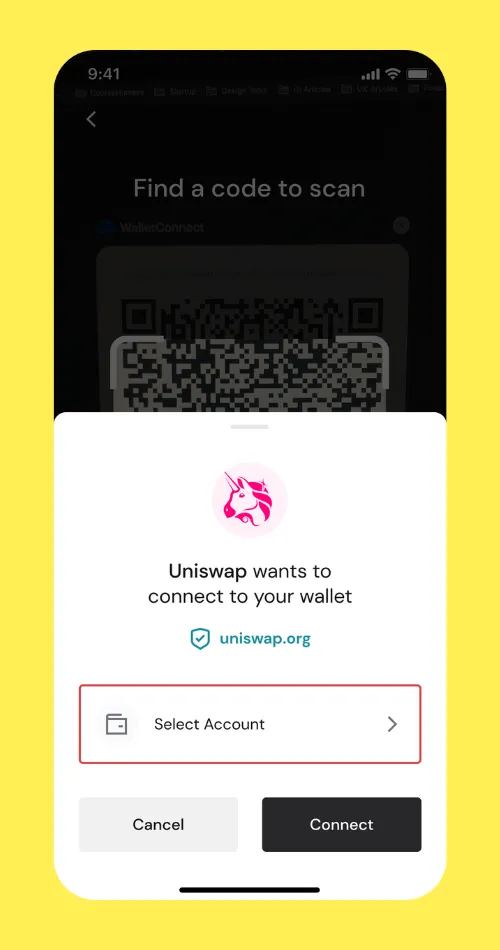
- Once you’ve scanned a QR, if you have multiple wallet accounts you’ll be prompted to choose which account within your Pera Wallet you’d like to connect. Once you select an account, tap Connect. The chosen account is now connected to the dApp.
💡 Note: You can remove these connections to dApps at any time by going to Menu -> Settings -> WalletConnect Sessions and then tapping the 3 dots next to the dApp. However, if you want to opt-out from a dApp, please visit the dApp website FAQ and/or contact their support to understand how to opt-out from the dApp. As we explained earlier, dApps are external third parties; disconnecting the session from Pera Wallet will not opt-out your account from the dApp.
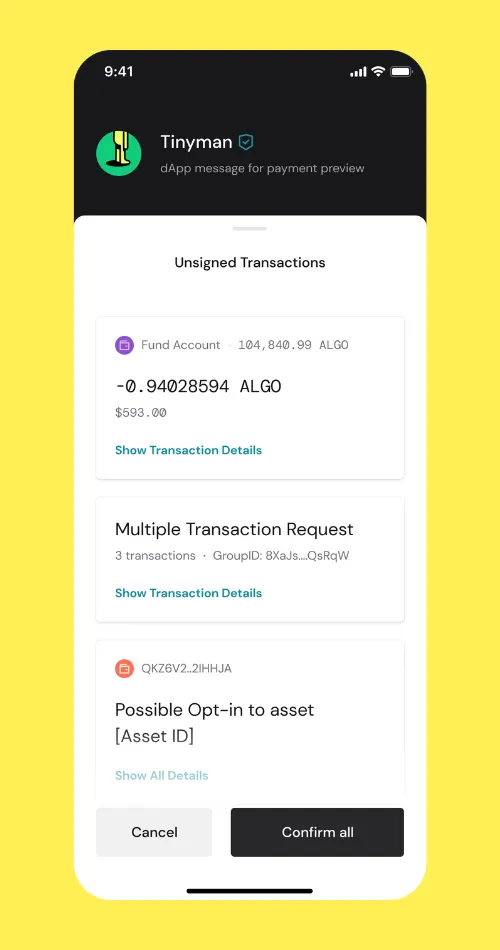
- Once you’re connected, the dApp may immediately send you a transaction request or they may wait for a prompt from you in your browser. Regardless, once they send a transaction request, review all the transactions by tapping into them and viewing the details. Once you feel comfortable, you can tap confirm to sign and send. If you would like to refuse, tap Decline.
- Review and Confirm (or Decline) the transaction request.
External applications also called dApps can make transaction requests that the Pera Wallet does not control. Please ensure you review these transactions carefully before approving and signing them. All transactions are irreversible. Never approve transactions from a dApp that you don’t know.
That’s it! The transactions are sent back to the dApp who then broadcasts them to the Algorand Blockchain.
Signing Transactions from a Mobile dApp
This section will walk you through how to sign transactions when you’re interacting with a dApp in a mobile browser or a mobile app. This is a mobile-only tutorial, and only requires your phone. This flow is almost identical to the flow above except that instead of scanning a QR, you’ll simply open the Pera Wallet on your phone when prompted.
All steps are the same except for step 2 and 3 above. We’ll jump in there.
- After tapping a button that reads something like Connect Wallet or Add Payment Option on a mobile app or browser, a popup will appear, asking if you’d like to connect a wallet. Select Pera Wallet from the list.
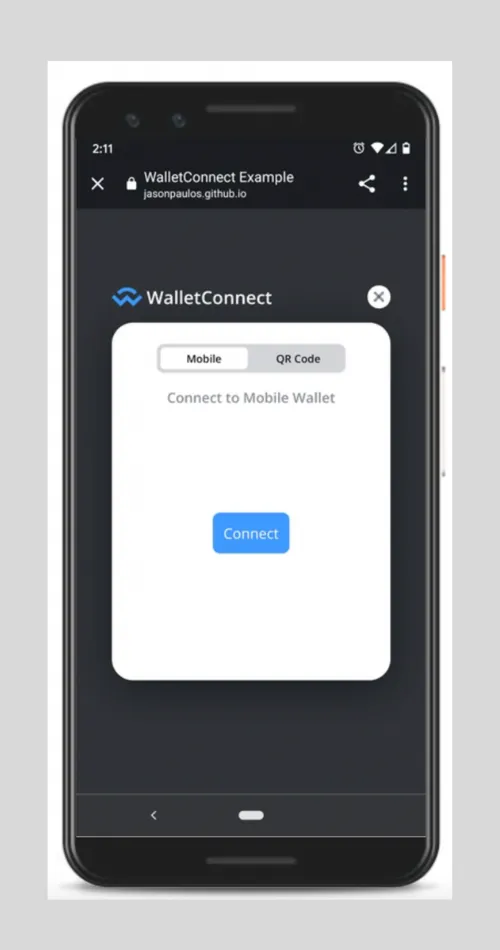
2b. Choose Pera Wallet from the list
Once you’ve chosen the Pera Wallet from the list, it will open up the Pera Wallet and you’ll find yourself in step 4 above.
Additional Tips
Quantum Accounts are new, so not every dApp has upgraded to support them yet. Some transactions may fail or come with different fees than usual, and Pera may show Fee Adjusted for Quantum Signing when a Quantum signature needs a higher fee. If you run into an issue, ask the dApp to add support, or use a non-Quantum account. See Create or upgrade to a Quantum Account.
If transactions data doesn’t seem correct when reviewing the transaction (amount, recipient, etc), please reach out to the dApp that is creating the transaction as Pera has no control over the transaction data.
If the connection to the dApp isn’t working, consider disconnecting (via Menu -> Settings -> WalletConnect Sessions) and re-connecting.


 Download Now
 Get Extension