Rekeying Your Algorand Account — When and Why
What is Rekeying?
Rekeying is a feature unique to Algorand that lets you assign a new private key to an existing account — without transferring your assets. Your address stays the same, your balances stay the same, but the key that authorizes transactions changes.
Think of it like changing the locks on your house. Same house, same address, new key.
When Should You Rekey?
Your passphrase may be compromised
If you think someone else has seen or accessed your recovery passphrase — even if you’re not sure — rekeying lets you secure the account immediately without having to move everything to a new address.
You want hardware wallet security on an existing account
You can rekey a standard Pera account to a Ledger device. After rekeying, all transactions must be approved on the Ledger — adding hardware-level security to an address you’ve been using.
You have locked or committed assets
If you have assets in smart contracts, liquidity pools, or other positions tied to your current address, moving them might be costly, time-consuming, or impossible. Rekeying secures the account without touching the assets.
You’re upgrading your security setup
Moving from a standard account to a hardware-secured one, or from one Ledger to a newer model — rekeying handles it cleanly.
How Rekeying Works
- You initiate a rekey transaction from your current account
- You select the new “authorized account” — this is the account whose key will now control the original
- The transaction is signed and confirmed on-chain
- From this point forward, all transactions from the original account must be signed by the new authorized account’s key
Your original address doesn’t change. Anyone sending you assets still uses the same address. The only thing that changes is which key is needed to sign outgoing transactions.
How to Rekey on Pera Mobile
Rekey to a Standard Account
Available for: Standard accounts (not Ledger or already-rekeyed accounts)
- Make sure the account you want to rekey to is already in your Pera Wallet
- Open the account you want to rekey
- Tap the three-dot More menu
- Select Rekey Account, then To a standard account
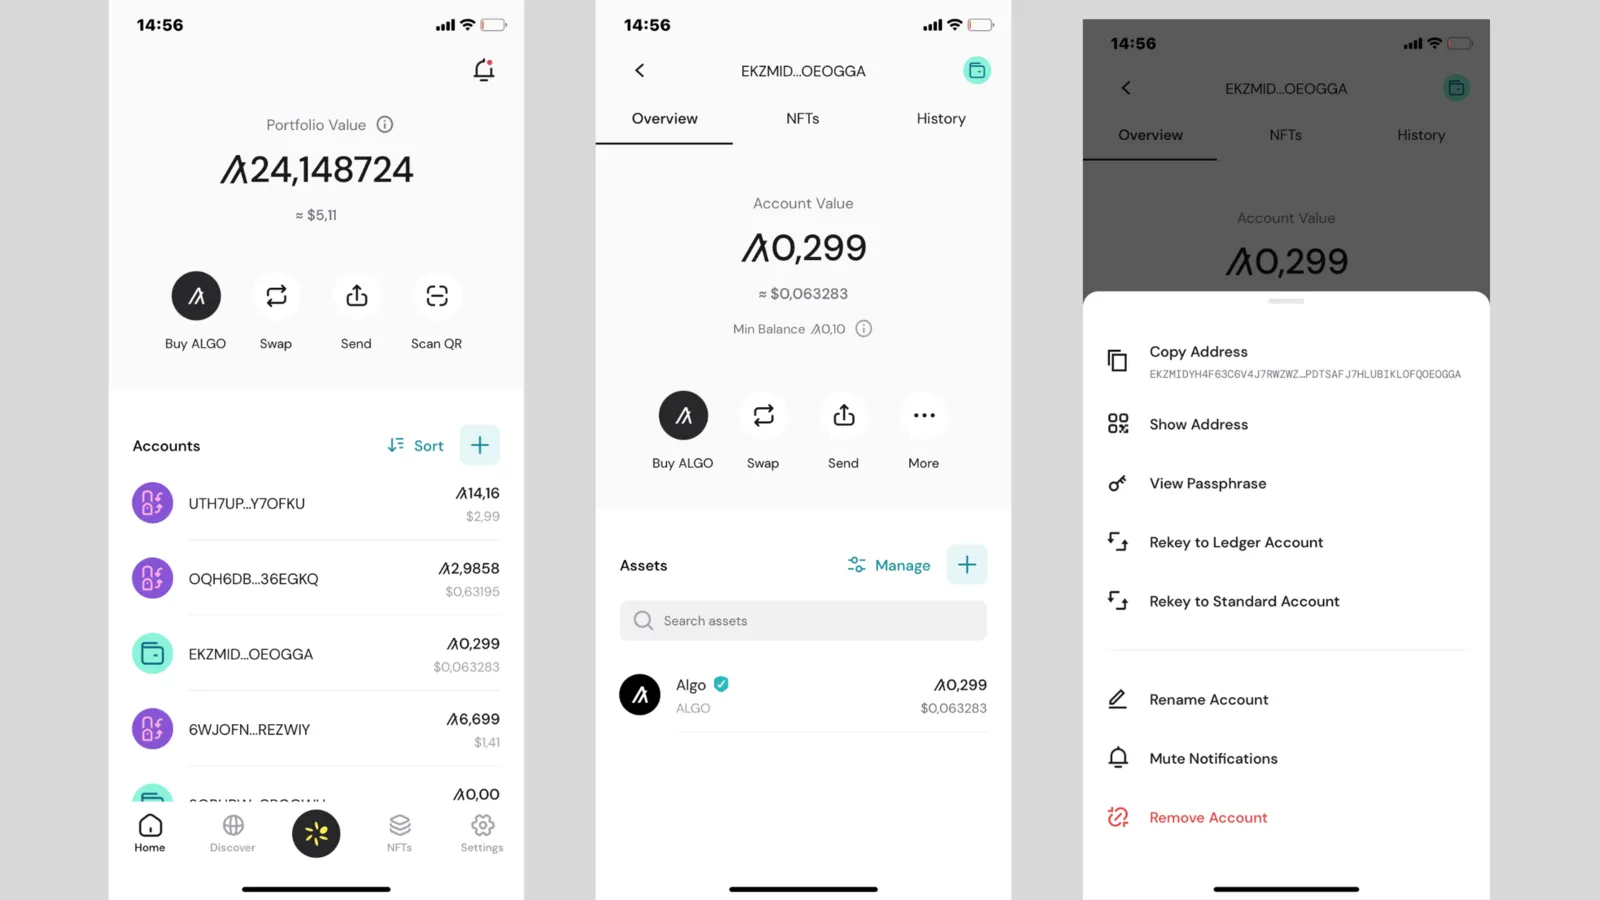
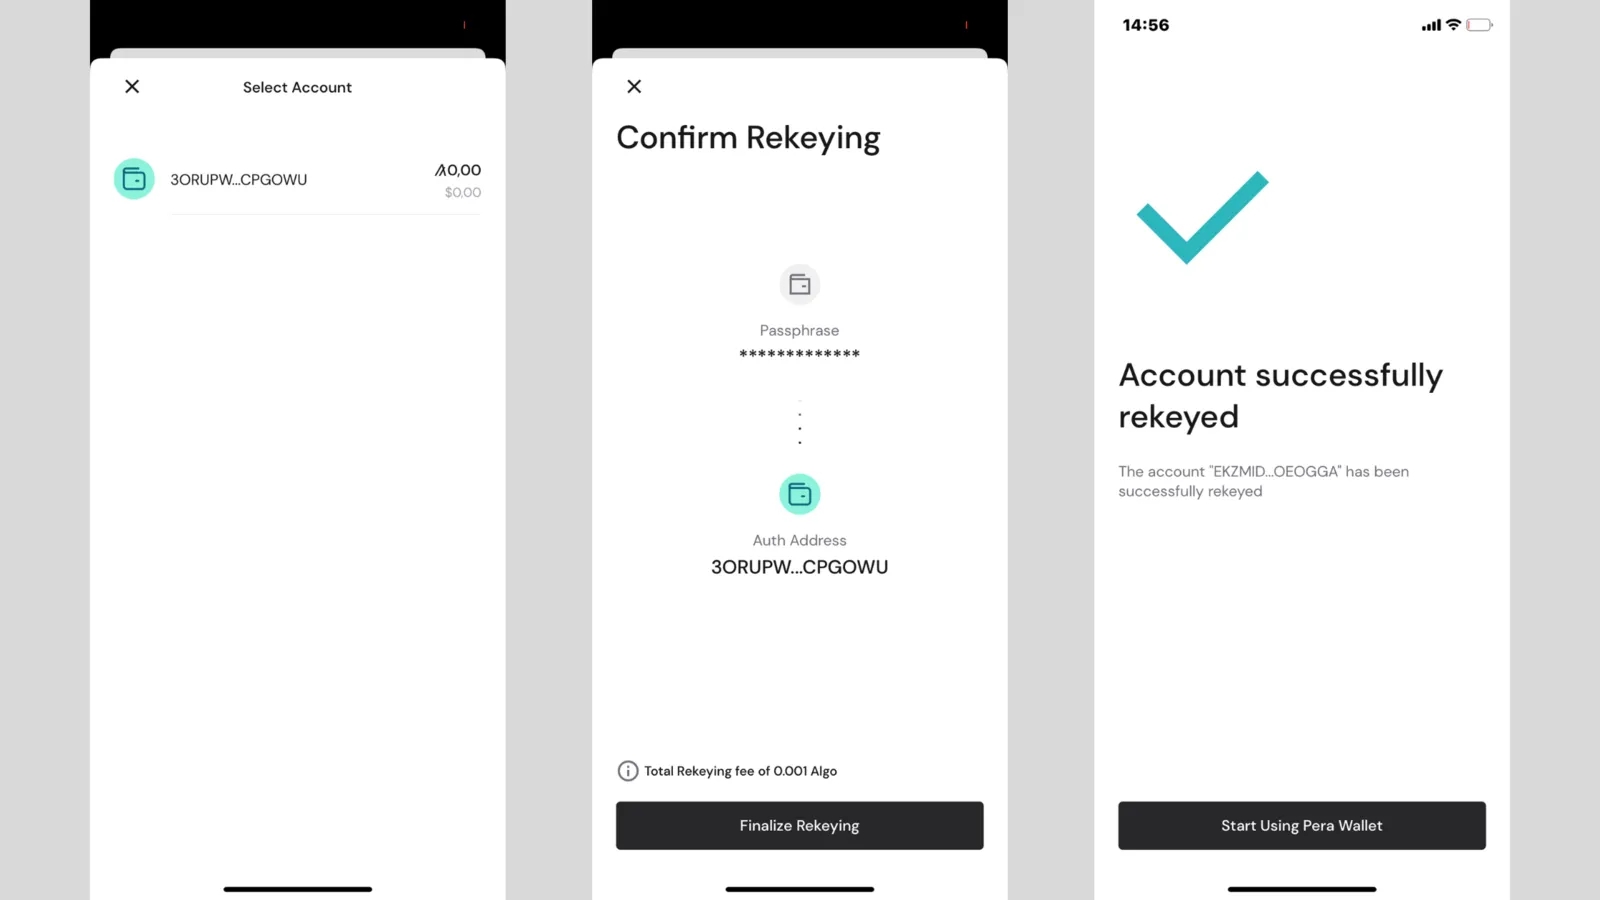
- Select the target account
- Review the summary and tap Confirm
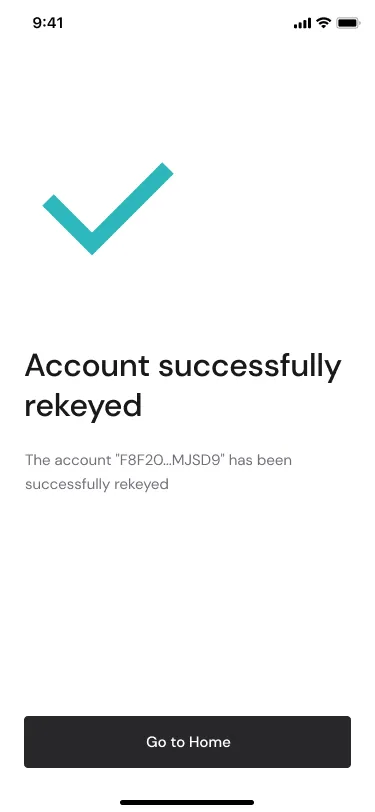
- Your account is now rekeyed — the new account is the “authorized account”
Rekey to a Ledger Account
Available for: Standard accounts, Ledger accounts, and already-rekeyed accounts
- Make sure your Ledger account is imported into Pera (pair via Import an account → Pair Ledger via Bluetooth or Pair Ledger via USB)
- Open the account you want to rekey
- Tap the three-dot More menu
- Select Rekey Account, then To a Ledger account
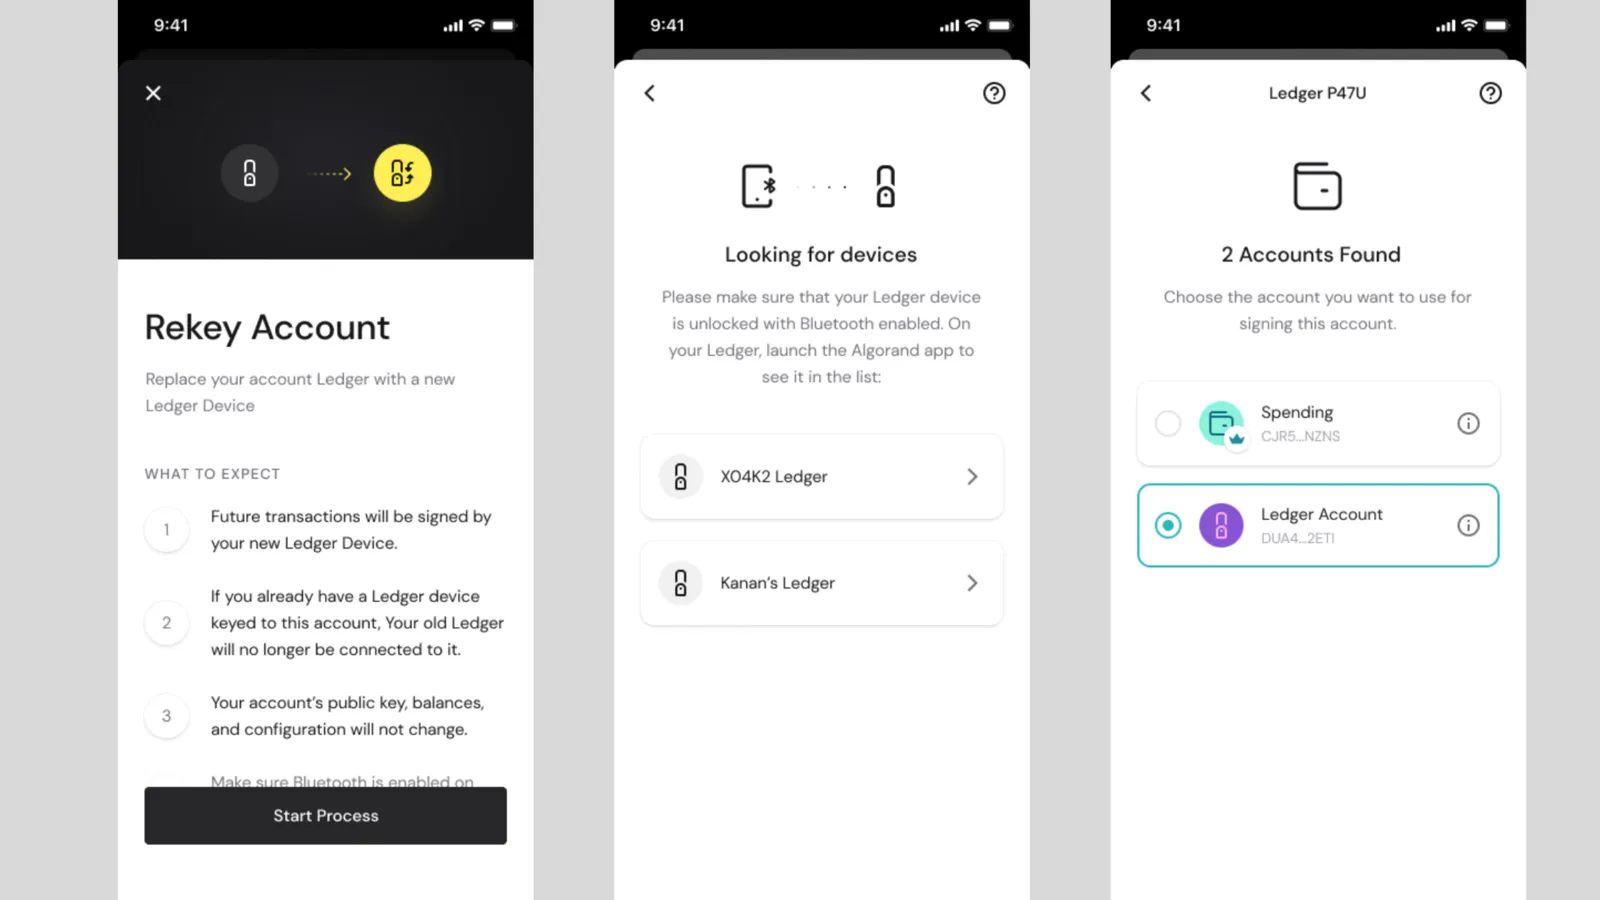
- Tap Start Process — make sure your Ledger is on, Algorand app open, Bluetooth enabled
- Select your Ledger device when it appears
- Choose the Ledger account to rekey to
- Review and tap Confirm
- Authorize the transaction on your Ledger
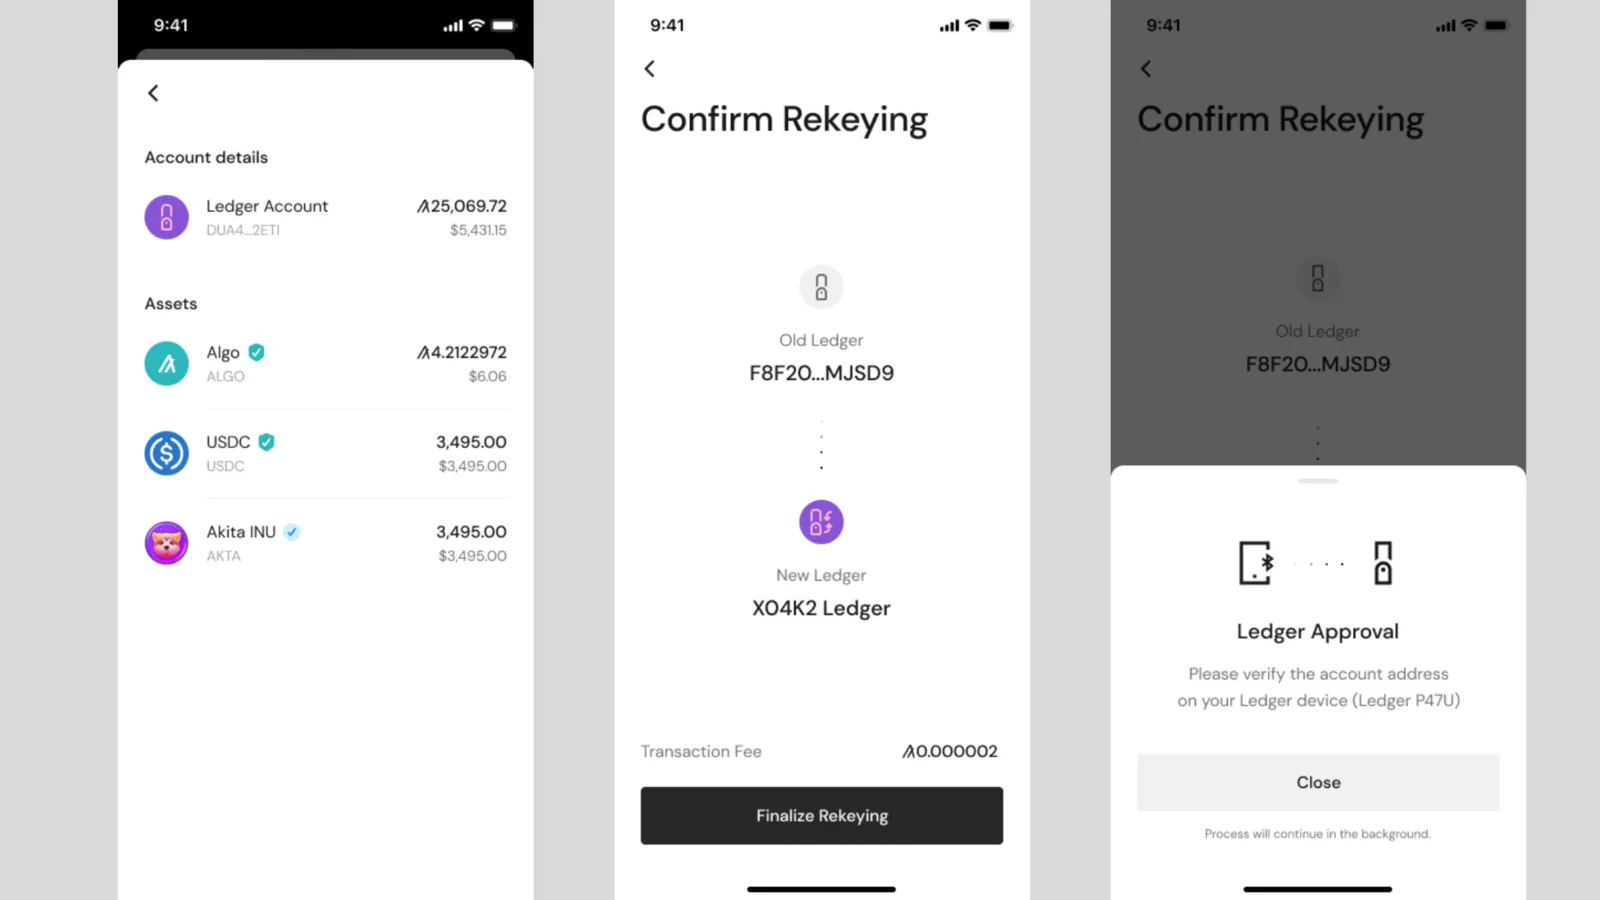
- Done — your account is now controlled by the Ledger
Rekey to a Quantum Account
You can rekey an account to a Quantum account in your wallet. Back up the Quantum account’s 25-word recovery passphrase first. Future transactions can only be signed by its post-quantum key, they pay a higher minimum network fee, and rekeying back to a standard account requires a quantum-signed transaction.
- Open the account you want to rekey and tap More
- Select Rekey Account, then To a quantum account
- Tap Start process, choose the Quantum account and tap Confirm
Important Things to Know After Rekeying
Keep both accounts in your wallet. After rekeying, you need the rekeyed (original) account and the authorized (new) account in your Pera Wallet. Removing either will cause issues.
The original passphrase no longer authorizes transactions. Only the new authorized account’s key can sign transactions. But the original passphrase still identifies the account on the blockchain — it just can’t spend from it anymore.
Rekeying is on-chain and visible. Anyone looking at your account on Pera Explorer can see that it’s been rekeyed and to which authorized account.
Be careful with dApps. Some dApps may not fully support rekeyed accounts. Test with a small transaction before committing large amounts through a dApp with a rekeyed account.
Can I Undo a Rekey?
In the account’s options, tap Undo Rekey. You need access to the authorized account to sign it, and you can also rekey to a different account instead. If the account was rekeyed to a Quantum account, rekeying back needs a quantum-signed transaction. If you’ve lost access to the authorized account, the rekeyed account is effectively locked — no one can sign transactions from it.
Rekeying vs. Moving Assets
| Rekeying | Moving Assets | |
|---|---|---|
| Address stays the same | ✅ | ❌ — new address |
| Assets stay in place | ✅ | ❌ — must transfer everything |
| Works with locked/committed assets | ✅ | ❌ — may not be possible |
| Transaction cost | One small fee | One fee per asset transferred |
| Complexity | Simple | Can be tedious with many assets |
Related Articles
- Self-Custody Explained: Why Pera Never Holds Your Keys
- Backing up your Recovery Passphrase
- How to Use Ledger with Pera Web
- Phishing & Scam Protection — 2026 Guide
Need more help? Visit perawallet.app/contact-us.


 Download Now
 Get Extension